Choose your Browser
If you need Microsoft Edge you can find it here.

If you need Microsoft Edge you can find it here.
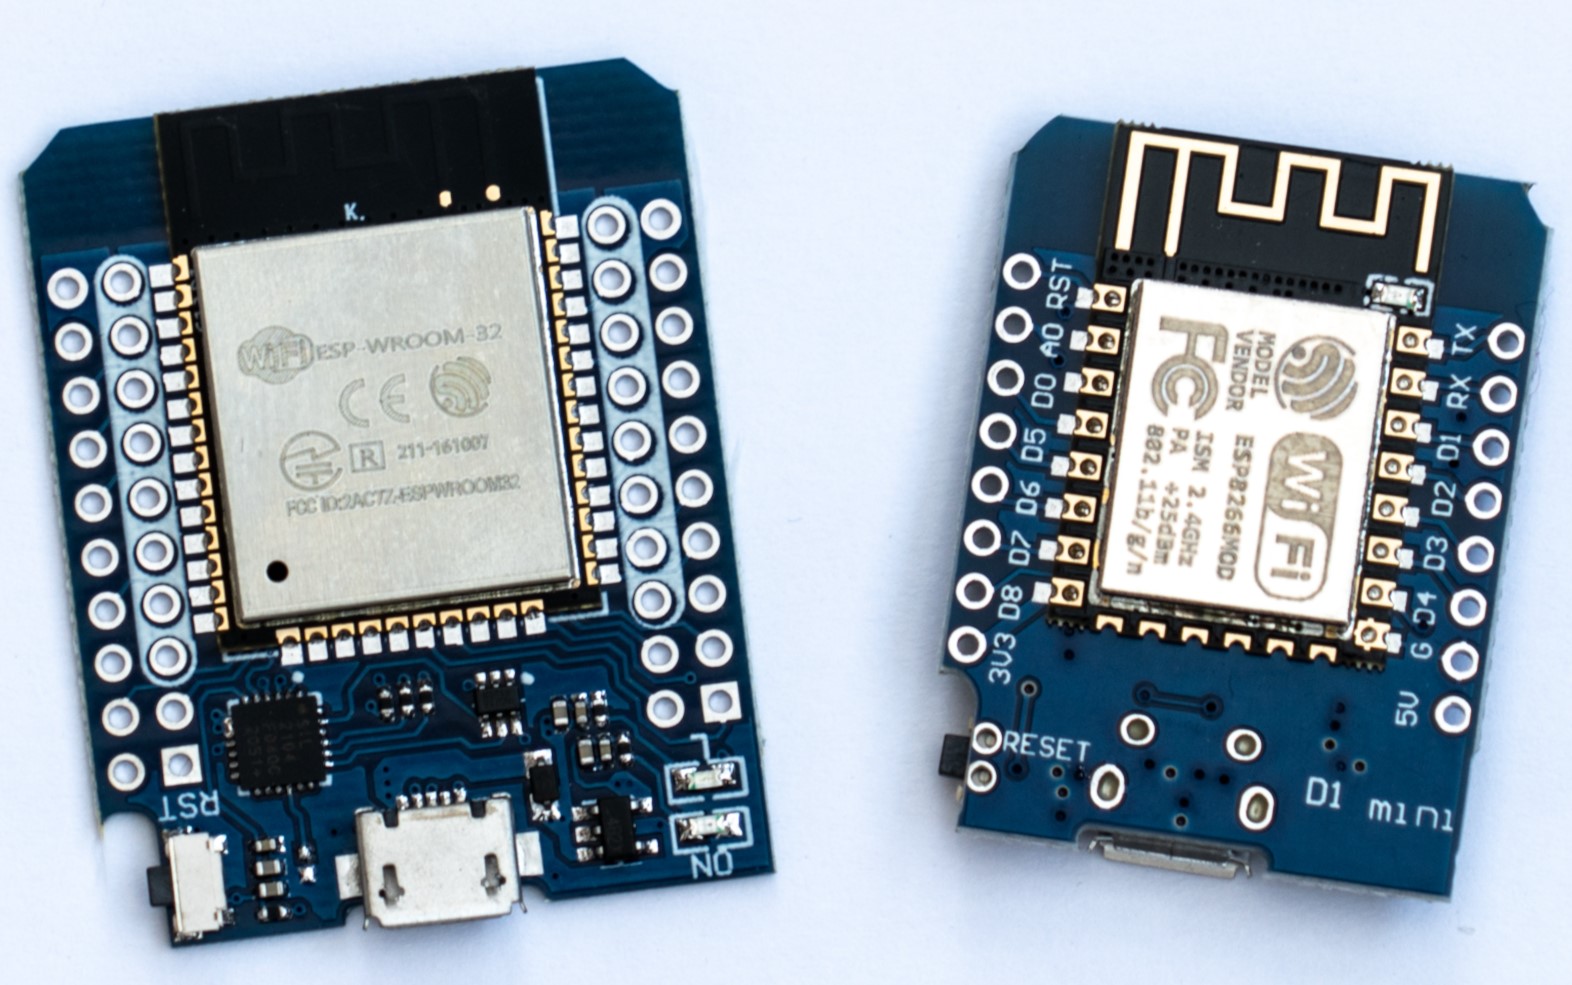
The next thing you will need is micro-controller. You can use the ESP8266 or the ESP32. These are available on lots of different boards, we suggest the WEMOS D1 mini if you want an ESP8266 or the WEMOS D1 ESP32 if you want the ESP32. You can find these devices from suppliers such as Ali Express.
If you are using a Name In Lights device it will already have a processor fitted and you can just connect it.
You'll need a usb cable to connect your device to your computer. When you plug it the computer should recognise it automatically and install the drivers. If it doesn't you may have to install them by hand.
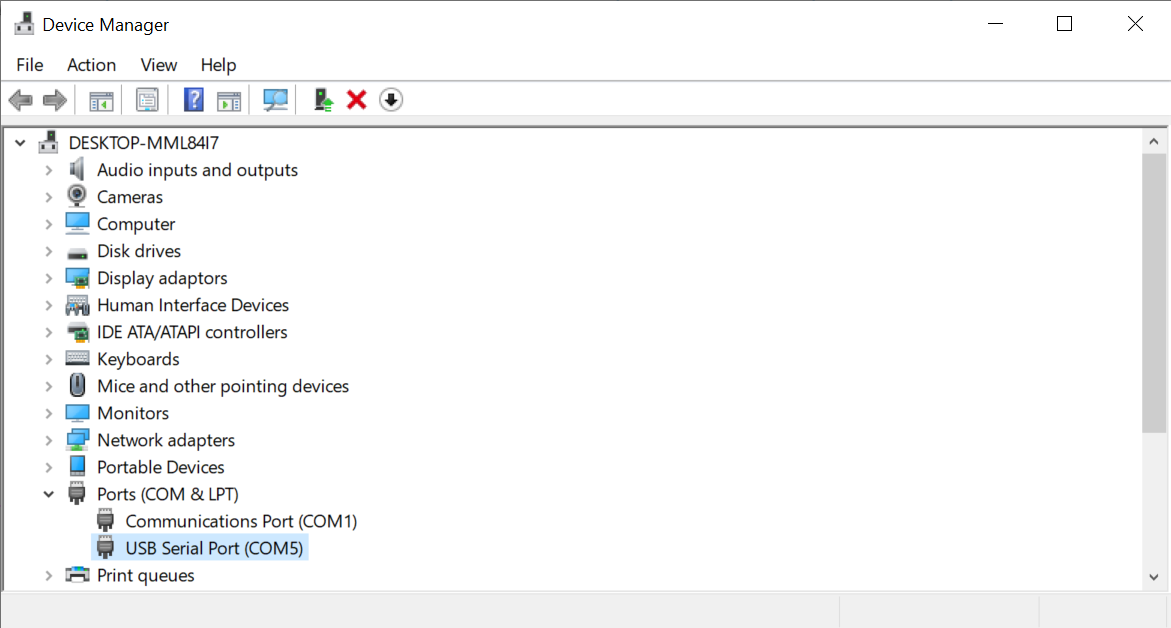
In Windows you can check in Device Manager to make sure that the device is working OK. Click the Windows Start button and search for 'Device' and then select the Device Manager from the menu. If all is well you should see your device appear. .
Next, you need to connect your device to the browser. Press the Connect Device button below when you are ready.
A dialog box will pop up inviting you to select a device to program.
I'm using a device connected to COM5. The number will vary, depending on which socket you plug the device into. If you are not using Windows 10 the ports won't have a number, instead there might be some strange names. You can try each one in turn, reloading the page between attempts. If the name includes the word 'Bluetooth' then I don't think it will work.
When you have selected the port you want to use, press the Connect button in the dialog to connect. Then move down to the next stage.

Now that you are connected you can start the process. Press the Flash button when you are ready.
Note that this will take a while. The log window will show the progress.
If the process stops at the 'sync' part this might be because your device has not reset. You can try pressing the reset button on your device, reloading this page in your browser and trying again.
We've not tested the process with every possible ESP device, and some don't respond to our reset signals. However, if you are using a Wemos device it should just work.
You can do all the configuration from this terminal. You type a command and send it to the box which then acts on the command. There are commands to store setting values in a box and also commands to tell a box what to do in response to an event. Press Connect to connect the terminal to your box.
To connect a box to your WiFi you need to set the name of the access point and the password for the network. You do this by assiging values to two settings:
            wifissid1=yourWiFiSSid
            wifipwd1=yourWiFipassword
These credentials will be stored securely in the box.
If you want your box to be able to connect to other boxes you will have to enter some MQTT creditials. You can use the oppen HiveMQTT server by making the following setting:
mqtthost=broker.hivemq.com
These credentials will be stored securely in the box.
Once you have entered these settings you can restart your box so that they take effect.
restart
A newly created device will try to establish a WiFi connection when it starts. You might see some messages about this.
If you get timeout messages in the Flash display your device might not be connected, or you might have selected the wrong device at the 'Get Connected' step. Try again with a different device. If you are not using a Wemos device you might need to press the Reset button on the device (along with a 'program' button) to get the device into the bootloader state. Do this while the device is connected and after you have clicked the Flash button.
If you don't see the start messages when your newly flashed device starts up it might be that your device is not compatible with the binary images. These are the devices that we know work at the moment. More will be added as we test them and build images.